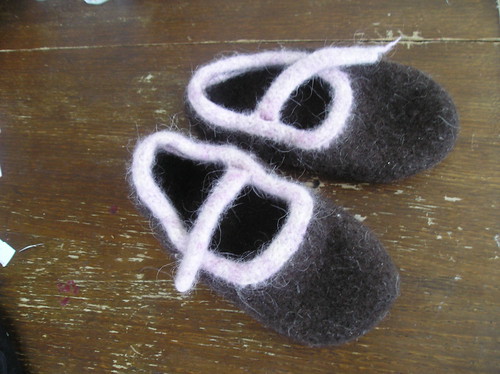
While I'm on the subject, felted (technically fulled, in this case) slippers are also perfect for last-minute Christmas gifts, as they work up very quickly, and all but the most egregious mistakes are covered up by the felting process. An average-sized pair of women's ballet or Mary Jane-style slippers can use less than 100-grams of wool (make sure it's 100% non-washable wool!), making these a very thrifty project as well, especially if you use one of the 40-50% coupons from the larger craft stores.
There are many free patterns available on the internet (I found 68 on Ravelry; 10 for crochet and 58 knitting). If you're willing to do a little math, this ballet/Mary Jane pattern is completely customizable. If, like me, you're too lazy to make and felt a swatch before doing the calculations, I've found that for knitting, holding worsted-weight yarn doubled (you can triple it for the soles, if they're worked separately), and knitting at a gauge of about 2 st/in (I use US size 15 needles) makes a fabric that felts readily and to a good thickness, but you'll have to check on the felting progress often to make sure you don't end up with slippers that are too small! (Crocheters will have to Google around for their own advice, I'm afraid, as I'm less experienced at such.)
Find out the shoe size of the giftee as surreptitiously as possible, and use a shoe size chart to determine the finished length in inches. Pre-felting, the slipper should be 130-150% of this size. I was able to finish the knitting for a pair of slippers for myself in less than an evening, because of the large gauge. It's a bit easier to double-strand the yarn if you have two balls to work from, but not really necessary. Sew the parts together, if the pattern requires it, and tie them into an old pillowcase. I recommend tying it shut with a piece of yarn, in a bow, so that you can undo the knot when wet; tying the pillowcase itself into a knot never seems to stay shut.
Throw it into the washing machine with some old towels or jeans, add a little detergent, and set your machine for the lowest water level, the hottest temperature, and the highest agitation settings it has. After 5 minutes of agitation or so, check the progress. It's possible that the slippers will have actually grown, because of the hot water, but don't worry; they'll start shrinking up soon. Keep checking back at least every 5 minutes, setting the dial back to the beginning of the wash cycle if necessary, until the slippers reach the desired size (I usually shoot for 1/2" or so smaller, as felt tends to stretch a bit as it is worn). At this point, rinse them out, roll them up in an old towel, and squeeze out the excess water (some people use the spin cycle on their washer for this, but I'm not quite that intrepid just yet). Wet felt is very malleable, so this is the time to stretch and squeeze the slippers into the desired shape, stuffing them with plastic bags to hold the toes and heels in place, if desired (I sometimes use cans to shape the heels). Find a sunny spot, and let them dry for 2-3 days. This process can be speeded up by setting them on a drying rack or other ventilated surface, and/or pointing a fan in their direction.
Once dry, I recommend using a bottle of puffy paint ($1.50) to paint a design of some sort on the soles of the slippers and give them a bit of traction, especially if they will be used by children. This could be as simple or elaborate as you like, and could include the wearer's monogram, or even a personal message. Optional additions would be a piece of grosgrain ribbon sewn around the inside edge to help prevent the aforementioned stretching, and embellishments such as buttons, bows, or appliqués.
Expenses:
- Yarn: 1-100 gr skein of 100% wool yarn $2.50-$3 (on sale/with a coupon; $6-8 is a typical full price)
- Puffy paint: 1 bottle (will cover multiple pairs) $1.50
Bonus ideas: Other great felted gifts include bags (481 free patterns on Ravelry), handle covers for cast-iron skillets, and oven mitts (for this one, make sure you felt it nice and thick, and I'd recommend using scissors or an old razor to trim some of the excess fuzz).

No comments:
Post a Comment